


Learning how to do street art
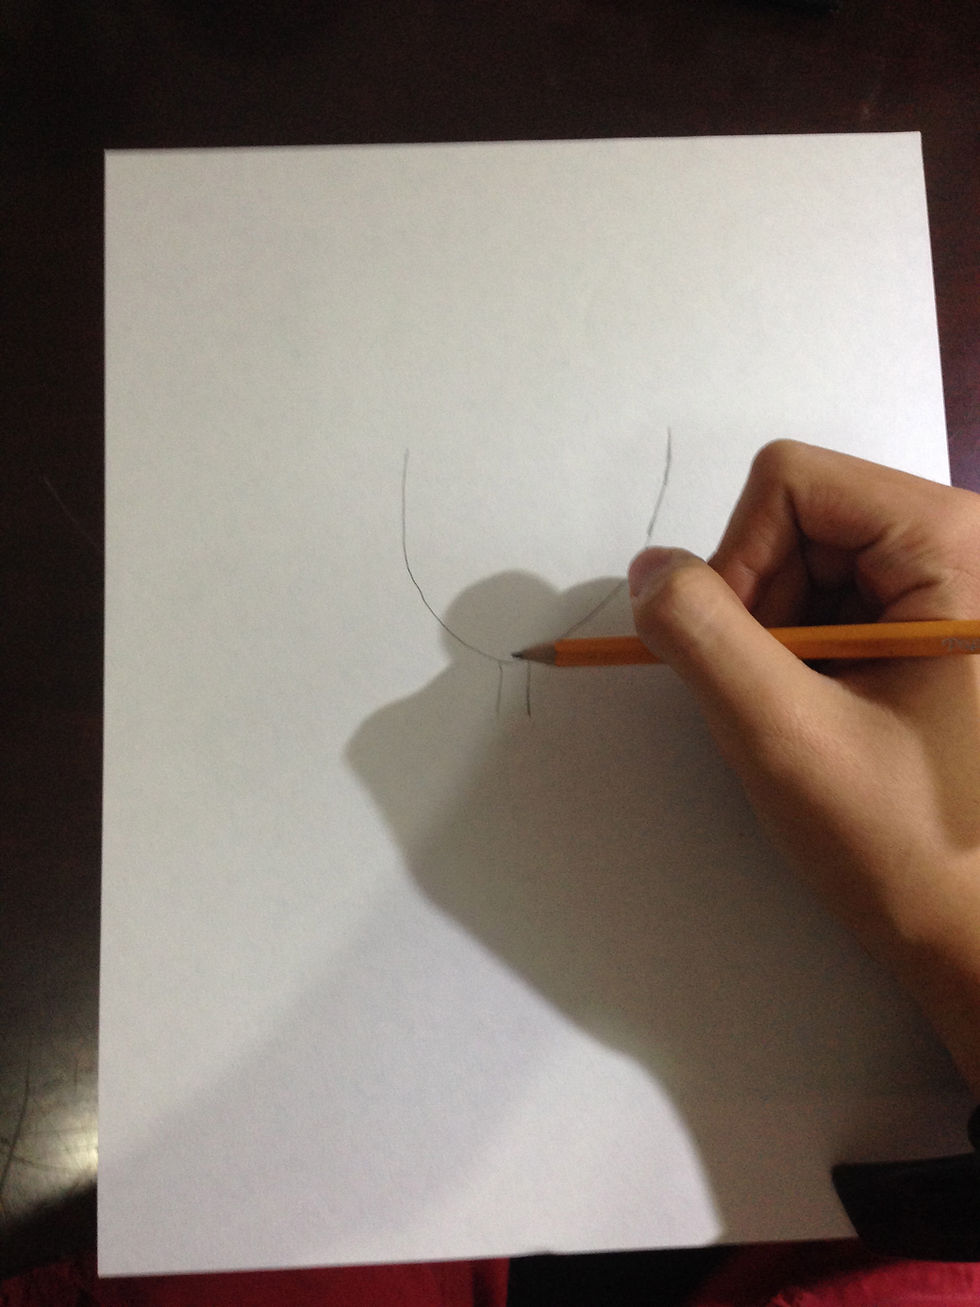
My tag:
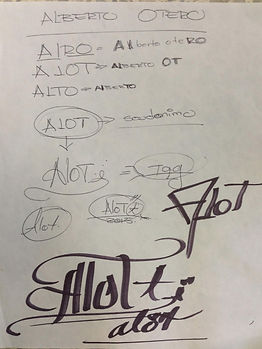
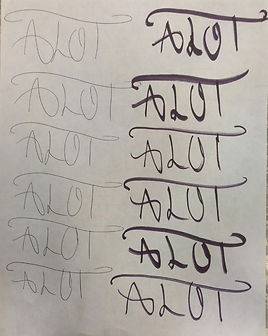

ATL skills:
-
Generate “what if?” questions.
-
Create original works and ideas and visualize alternatives.
-
Playing with ideas and experimenting.
-
Recognizing when an original idea has value and pursuing it.
-
Practice strategies to reduce stress and anxiety.
-
Consider personal relationships to people, ideas and concepts.
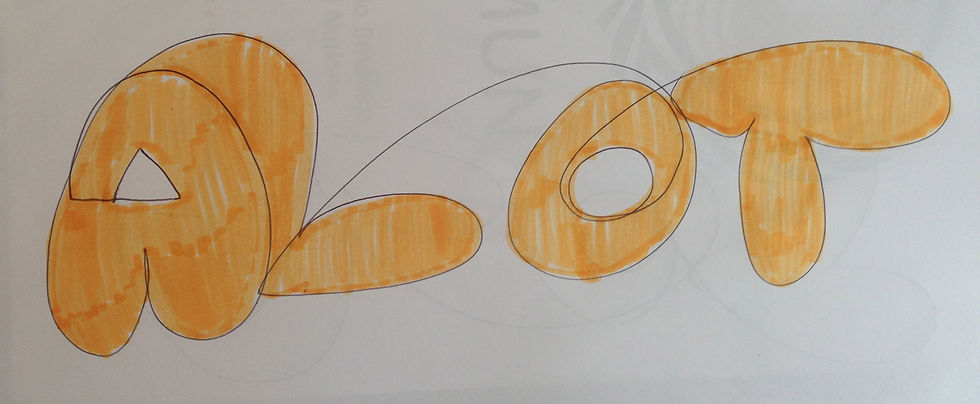
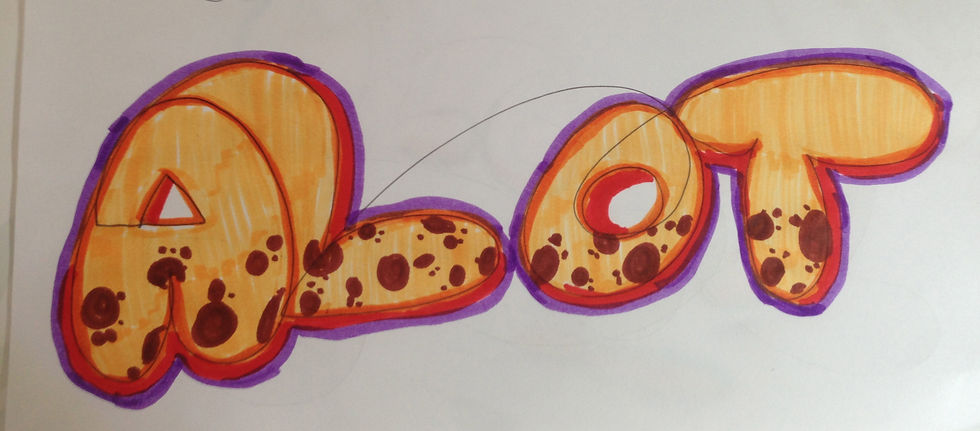
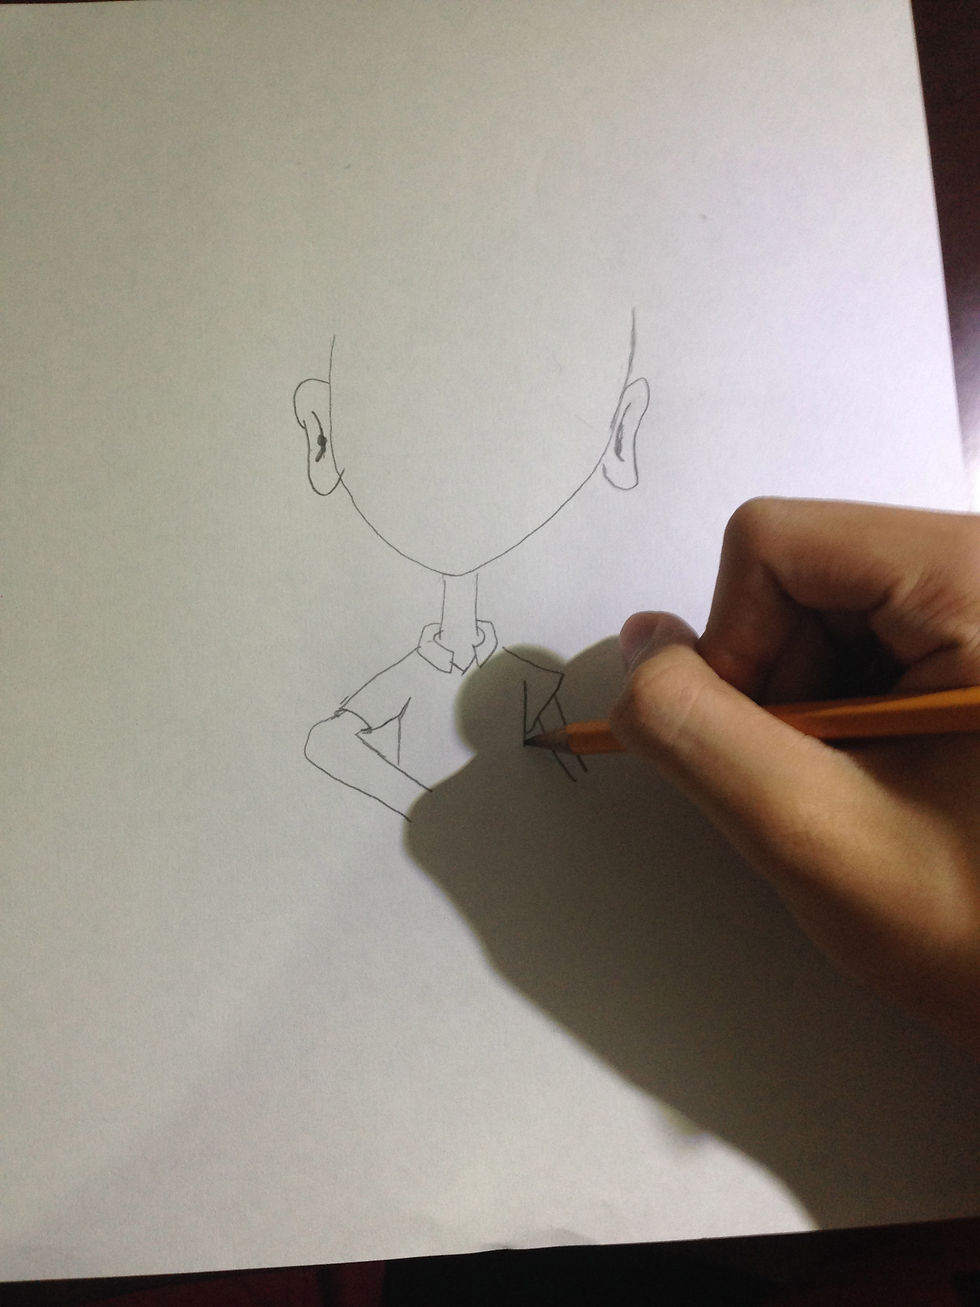
My monoline:


ATL skills:
-
Create original works and ideas and visualize alternatives.
-
Practice imitation of works with focus on the creative process.
-
Playing with ideas and experimenting.
-
Make connections between learning gained in different subject areas.
-
Create projects and products using knowledge and skills gained across different subject areas.
-
Utilize old ideas in new ways and combine parts in new ways.
Video Tutorials
How to do stencils?
This is a tutorial I saw on how to make a simple stencil:
It showed an example of a tree, which had a positive space (the black space) and was continuous. Then it showed the example of a zebra where the continuous line was the negative space (the white space). After drawing the stencil the positive space was simply cut and used.
This is a video which focuses on how to cut a stencil:
It used a printed image of a tiger as an example and explained how all the lines from the stencil needed to be connected (toughing each other) and there couldn't be any dots or dashed. Then all the white spaces where cut off and what was left was the stencil.
These videos were tutorials on how to make a multi-layered stencil:
Although the first tutorial was basically using Photoshop, at the end in shows how the different layers of stencils would look like when they were printed. Then the second video was an example of an actual and big stencil, and although there was no explanation it showed me how the layers go from lighter to darker and become more detailed.
This video show how to do a really large stencil:
This video show a webpage that can turn an image into a printable PDF which divides it into many pages that should then assembled for making the stencil. The website is called block posters and the tutorial shows how to get together the printed pages and use them to cut the stencil.
This is a video on general tips for doing stencils:
The video was really helpful and gave great advices. It started talking about the proper materials that were needed for doing the stencil, and which were the best kind for this. Then it gave tips on how to draw the stencil and then cut it with an art knife. Finally it also gave good advices on the spray-painting techniques that were good for doing a having a stencil with better quality.
How to do wheat pasting?:
These are tutorials I saw on how to do a cheap and easy wheat paste:
The only things you need are all purpose flour, 2 cups, 1 tablespoon, a cooking pot, and heat. You basically heat 1 cup of water and in the cooking pot and in the other cup you mix 3 tablespoons of flour with a full glass of water (you should get a thin mixture). You simply pour the mixture into the heated water and slowly mix it, let it boil, and then turn of the heat and let it cool.
This is a more detailed tutorial about wheat paste and how to apply it:
The video shows how to produce a larger amount of wheat paste for pasting bigger posters. It also uses more professional materials for the paste, a small broom as a brush, and an extension tube for pasting the poster high. At the end it shows how he did wheat pasting in different streets.
Combination stencil and wheat paste:
This is a video that uses stencil and wheat pasting techniques. It first shows how a stencil of a face is done and cut, and afterward it uses spray painting on a separate paper. Then he uses the spray-painted faces and pastes them on different places with wheat paste.
How to do sticker art?
This video showed how to do stickers with sticker paper:
This was a really simple tutorial showing how to use sticker paper for making stickers. It showed 3 possible ways, which were by using stencils, markers, or simply printing imager directly into the sticker paper then the only thing which you needed to do was cutting the sticker and pasting it where you wanted.
This is another video showing how to do stickers:
This one was a little bit different than the other one since it showed another possibility for doing stickers, which is first drawing them on paper and then scanning them into your computer. After you do that you can edit your designs in Photoshop (add colour or improve them a little bit), and finally simply print them in adhesive paper.
ATL skills:
-
Identify problems and develop aims, goals and objectives.
-
Plan to achieve goals, including identifying targets and outlining steps.
-
Playing with ideas and experimenting.
-
Demonstrate personal responsibility for lifelong learning.
-
Practice strategies to reduce stress and anxiety.
-
Develop awareness of the process of effective learning.
Product ideas:
-
Obsession to technological devices.
-
Bullying.
-
School “slavery”.
-
Helping the environment.
-
Addiction.

Since the beginning of my personal project my goal was to create a piece of street art with a social message. For this reason I’ve came up with this list of possible topics that I can give a message about:
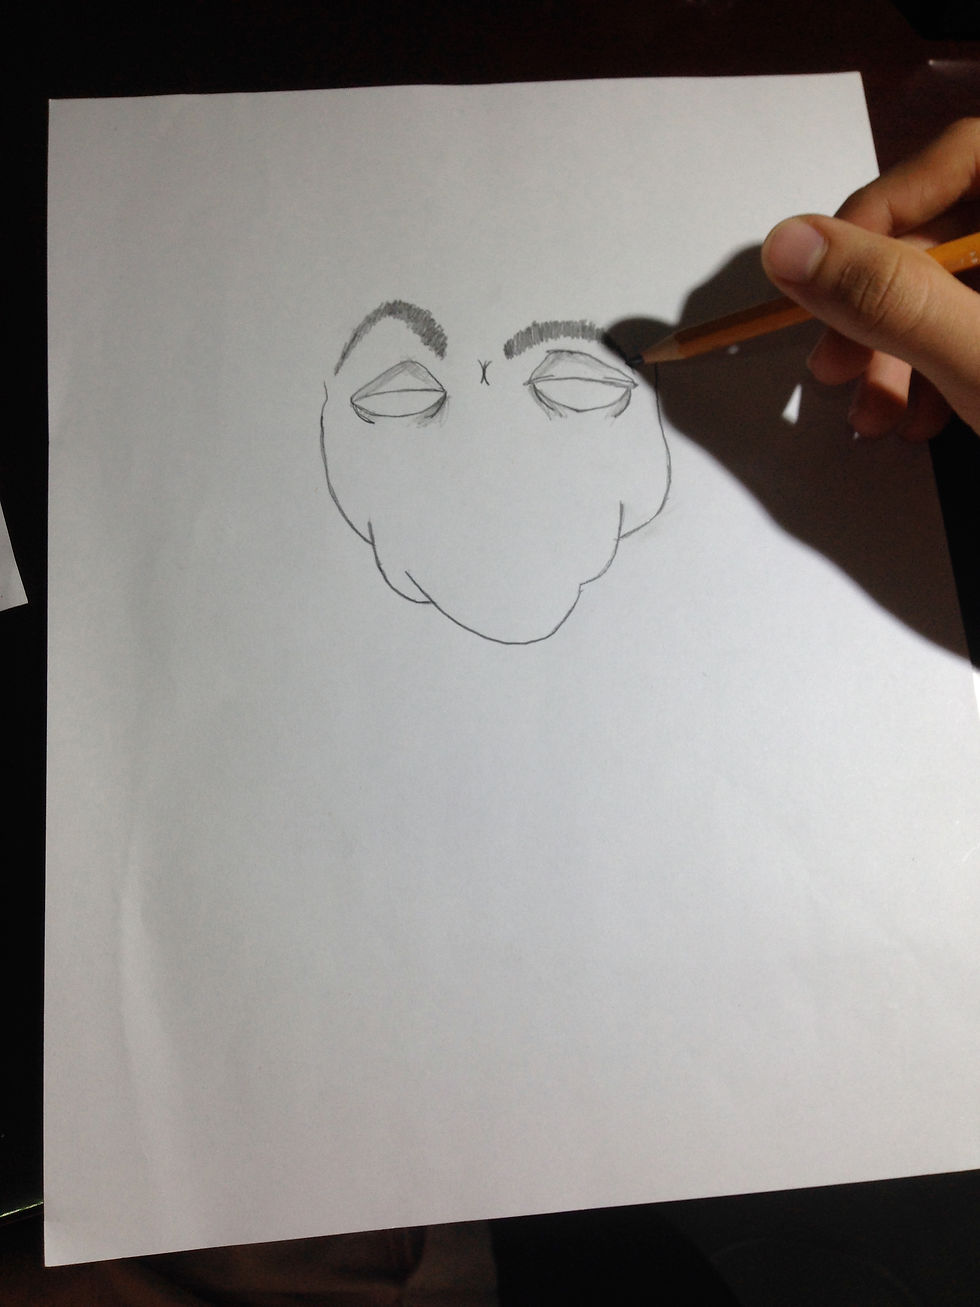
sketches (Done with stencils)
I decided to narrow my 5 options just to 3 and these are some ideas I have for them….

-
Obsession to technological devices.

-
School “slavery”.

-
Bullying.
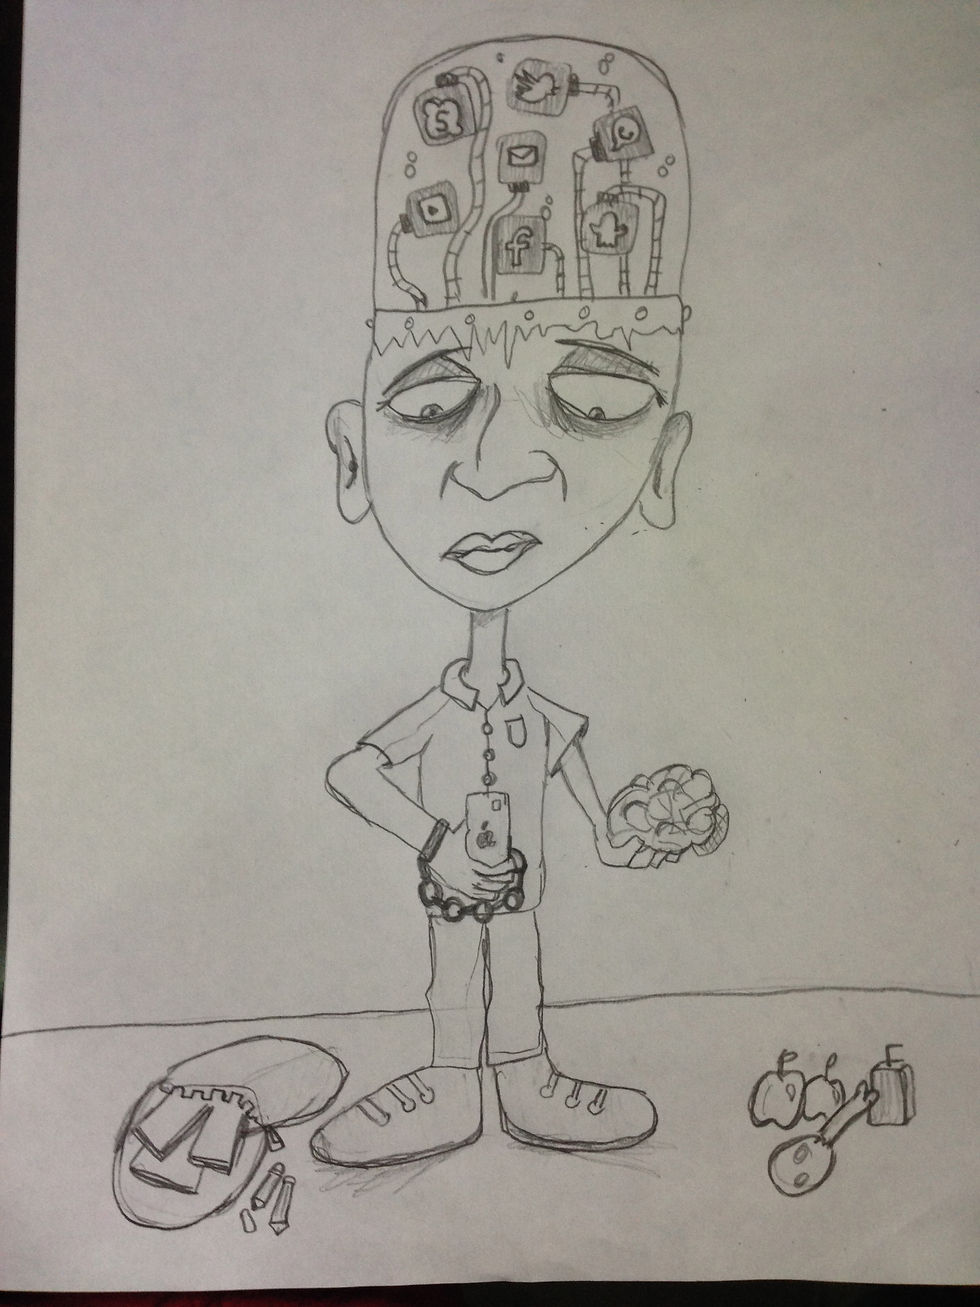
After thinking about it I decided the best option was “obsession to technological devices”, so I started developing the final idea I had...
Final Product sketches
-
Rough sketch

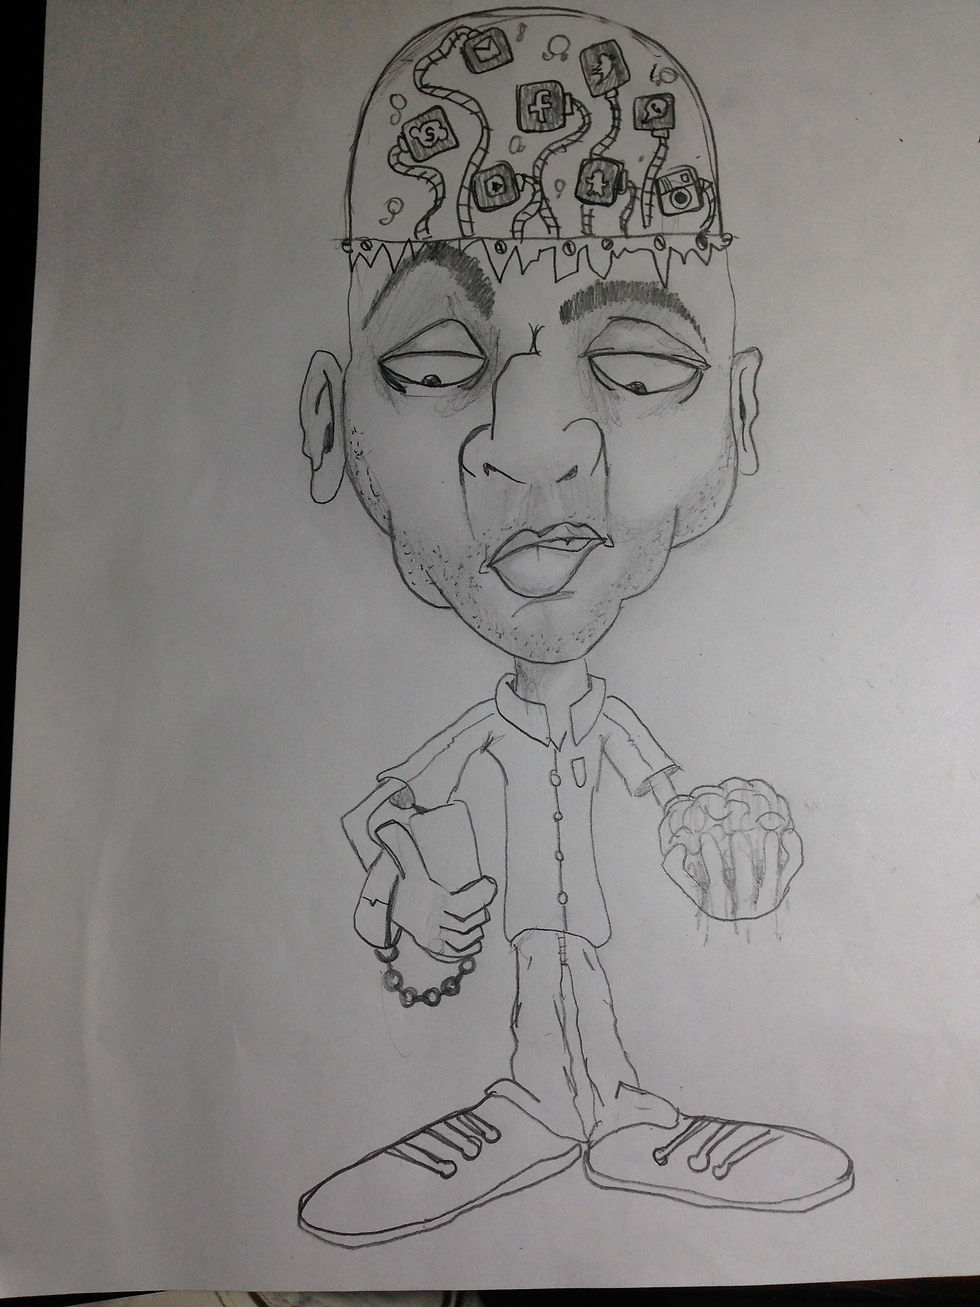
-
Detailed sketch
ATL skills:
-
Plan to achieve goals, including identifying targets and outlining steps.
-
Consider all alternatives.
-
Generate “what if?” questions.
-
Create original works and ideas and visualize alternatives.
-
Playing with ideas and experimenting.
-
Recognizing when an original idea has value and pursuing it.
-
Make decision.
Graffiti workshop:
ATL skills:
-
Identify problems and develop aims, goals and objectives.
-
Generate “what if?” questions.
-
Plan to achieve goals, including identifying targets and outlining steps.
-
Seeing possibilities, problems and challenges positively.
-
Demonstrate personal responsibility for lifelong learning.
-
Keep to classes schedules and project deadlines.
-
Develop awareness of the process of effective learning.
-
Negotiate goals and limitations with peers and teachers.

I went back to the street art shop I found some weeks before (when I was looking at street art in Cali) and asked for more information about the courses they gave there. I told the owner of the shop about my personal project and the goal I wanted to achieve, and he appeared to be exited about teaching me what I needed for doing so. We arranged some classes (he was going to go to my home) and they were going to be divided into a theoretical and a practical lesson.
I was very anxious about it and 2 weeks later Repso (the owner of the shop and who was going to be my teacher) came to my home for the theoretical class. Here we mostly talked more deeply about my project and the ideas I had for my product. He brought some material for me too, and he lent me a really useful book about graffiti and urban art, which had lots of important and accurate information plus really good images as examples of what it talked about. In addition, this session (which lasted around 4 hours) helped me to clarify some doubts I had. It was useful that Repso answered all the questions I had from my investigation and planning stages, and on top on that confirmed some things I found on pages that were not very reliable. Overall, it was a really good class since I reviewed the different types of street art, the various styles of graffiti itself, the history, and we discussed on what was needed for making my goal a reality. More importantly I learned how to theoretically work with spray painting. He basically said how to hold the aerosol paint, how I was supposed o use it, and how it worked.
I took advantage of the class and also did an interview to Repso (I did that as another process journal entry). He is someone with a lot of experience since he has been working with street art for over 15 years, so he had valuable information inside him. Lastly, I showed him my sketches and he really liked them and supported my idea. He even congratulated me for my creativity and I felt really good by someone like him saying that to me. I was very satisfied with everything and I also had fun. The last thing we did was arranging the practical lesson and planning really well what we were going to do then.

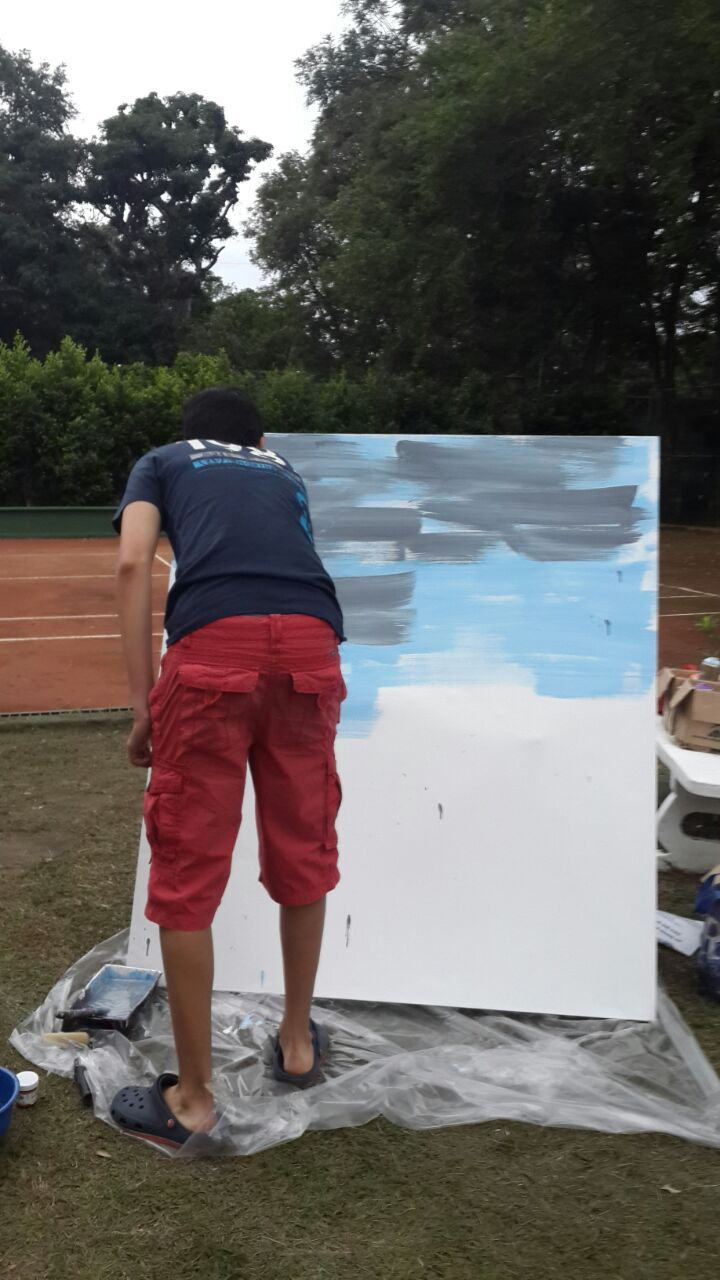
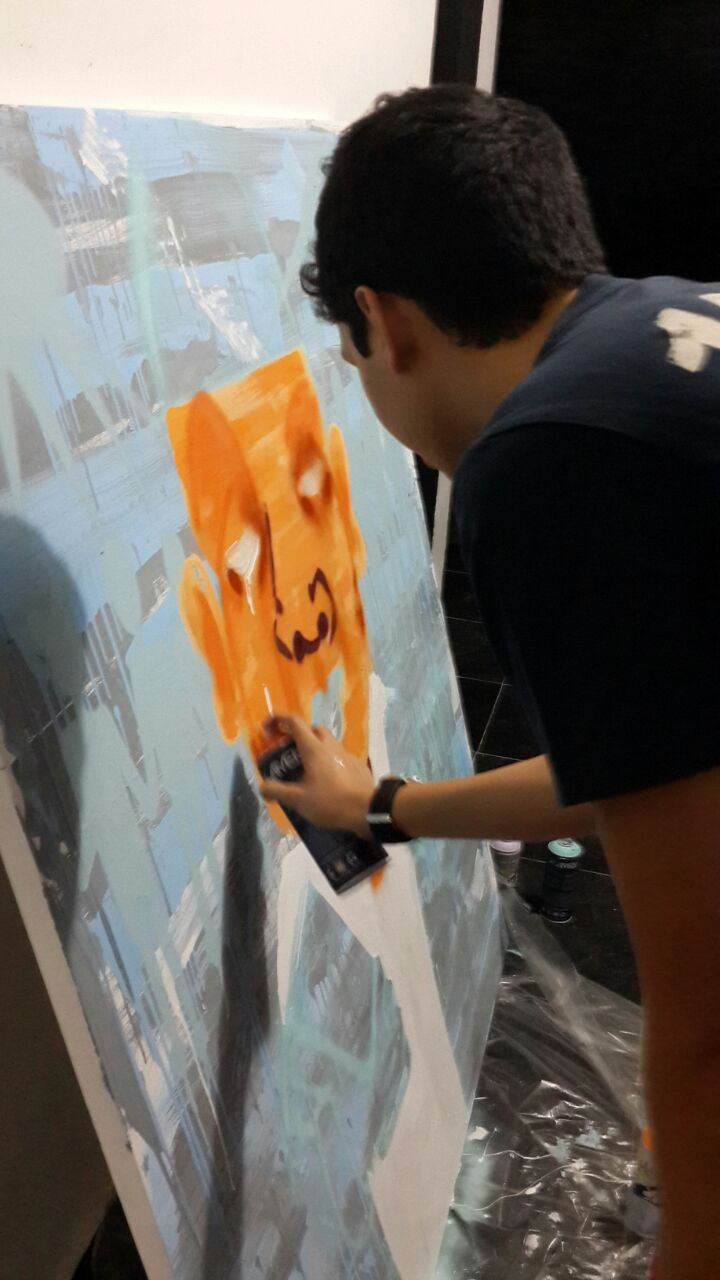
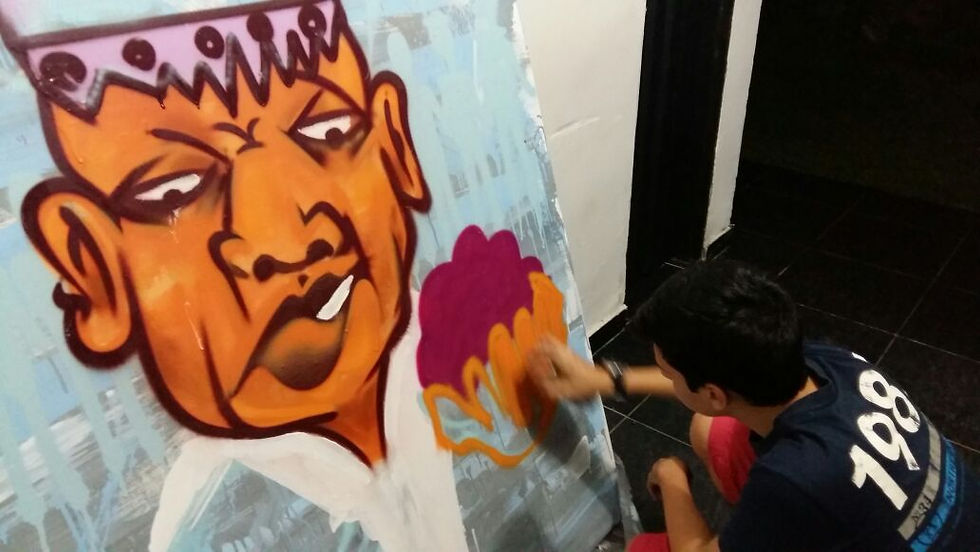
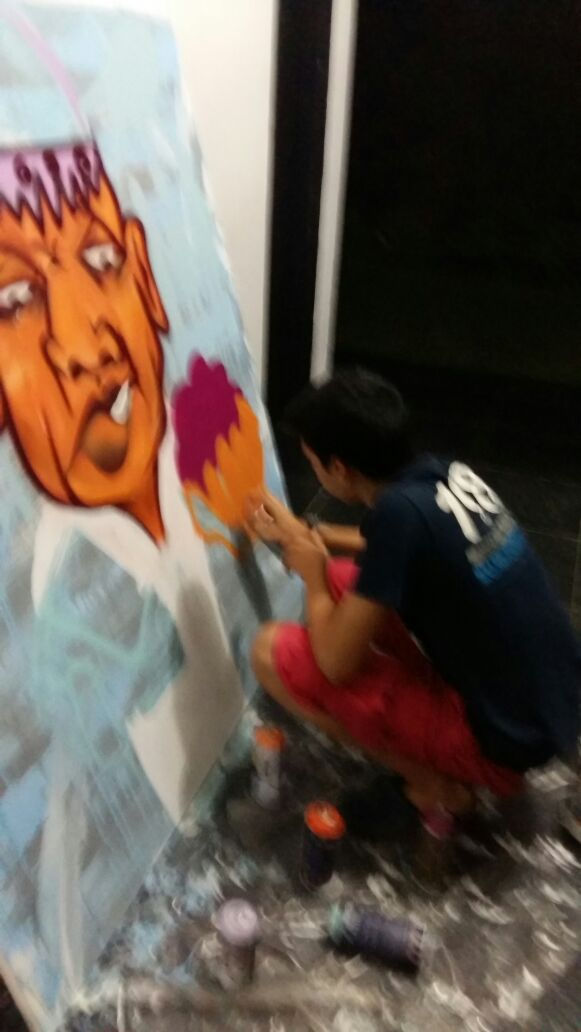
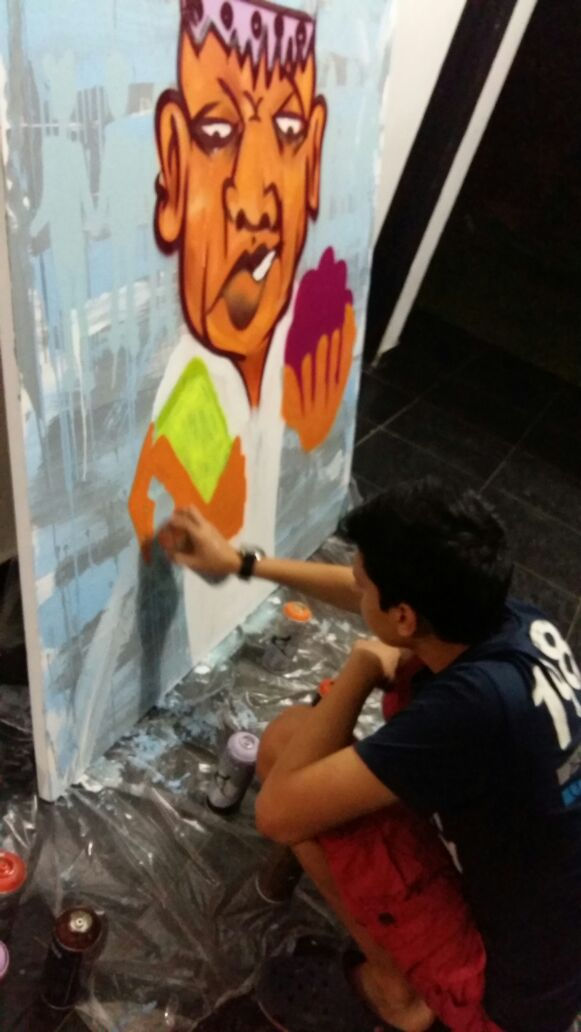
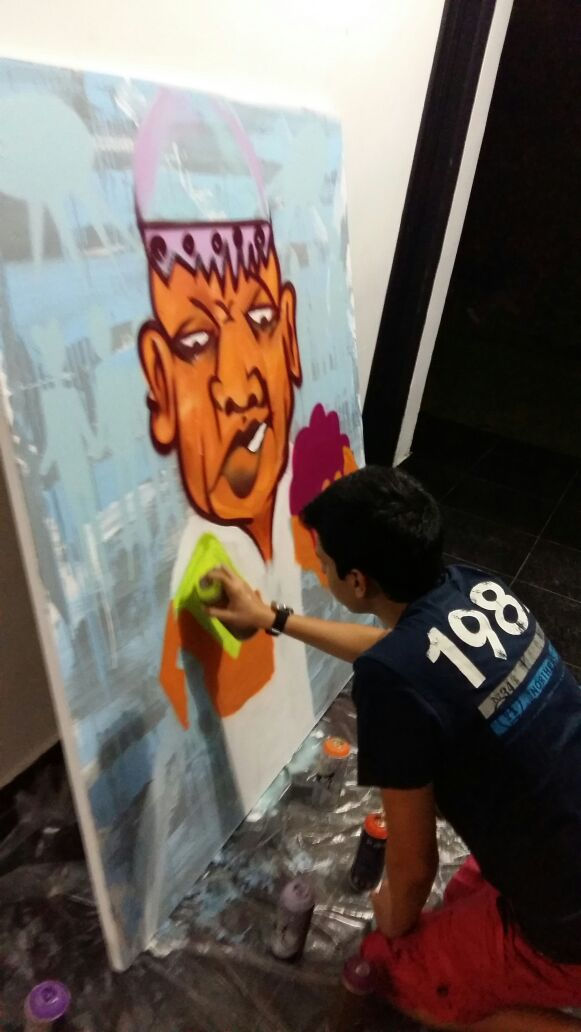
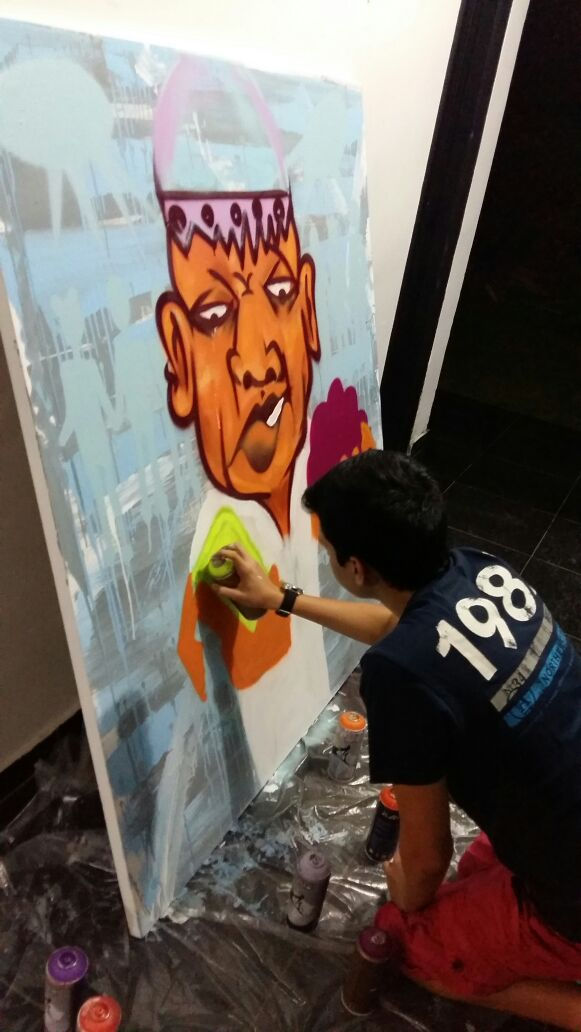
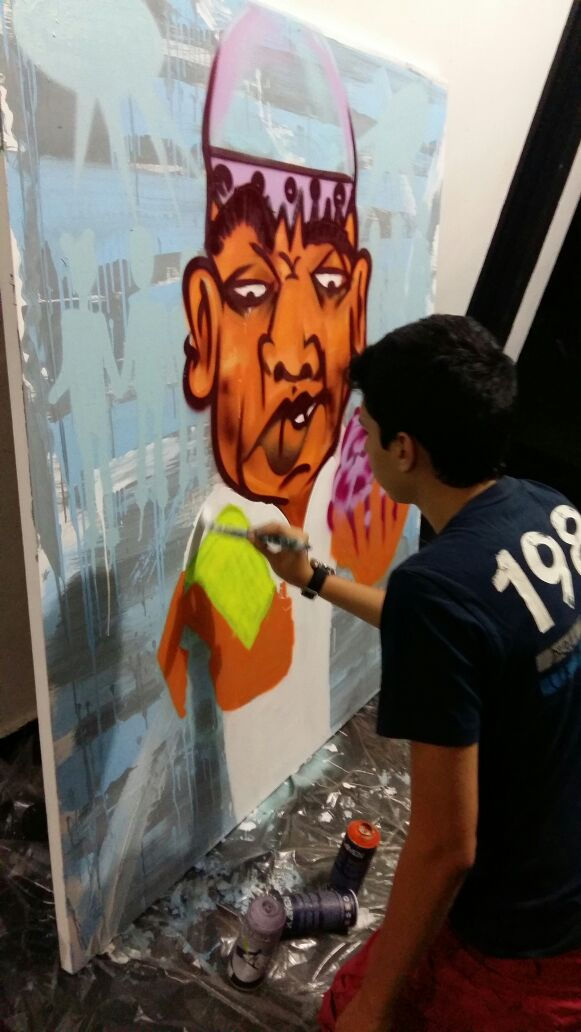
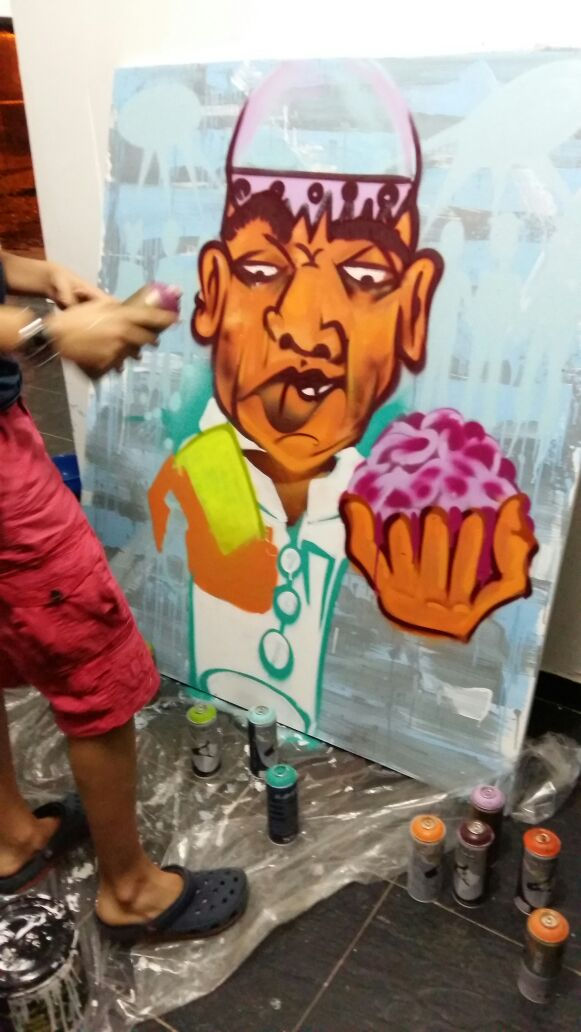
Creation of final Product:
The creation of my final product wasn't so easy, since it took a lot of time for me to complete it and I had to face many obstacles. However I had fun doing it and I am really happy with my result. With the course I took I also learned how to work with spray-painting and this was definitely something that helped me improve my art skills.

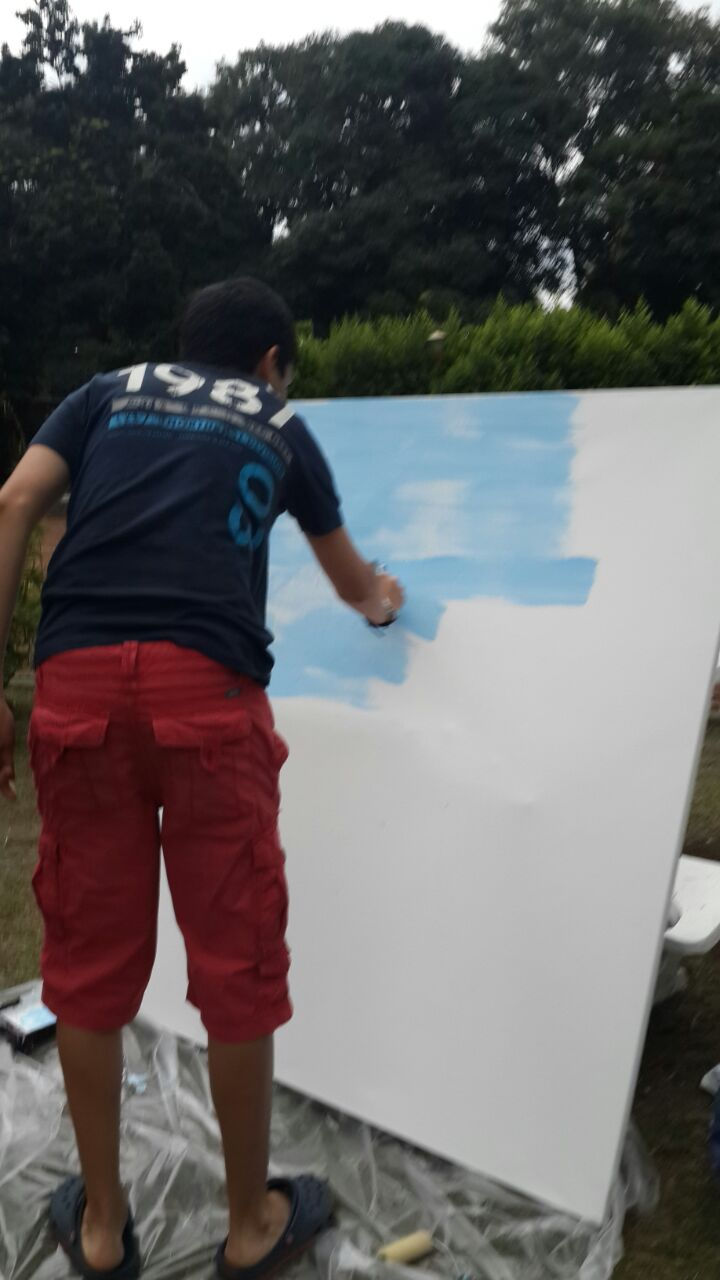


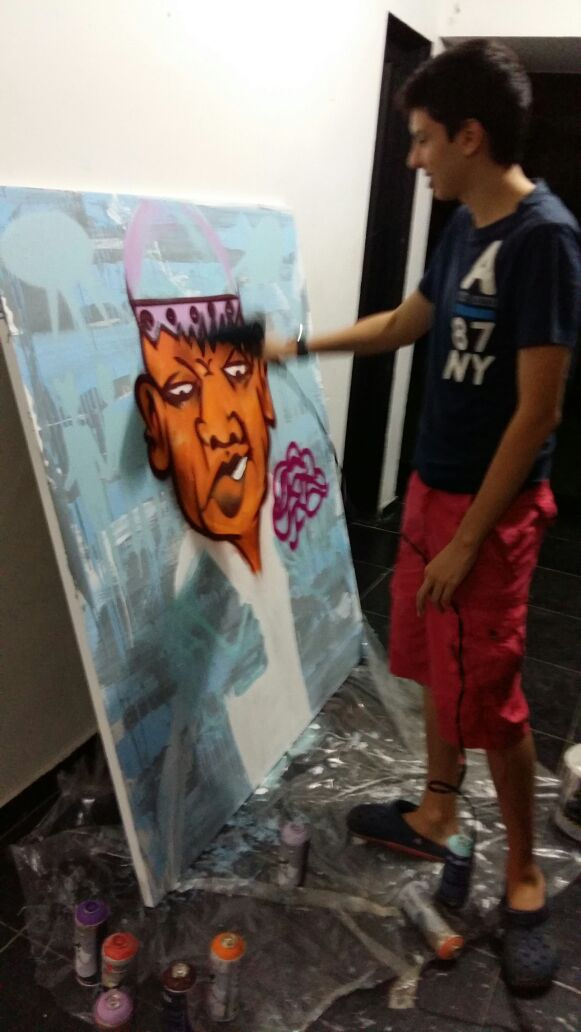

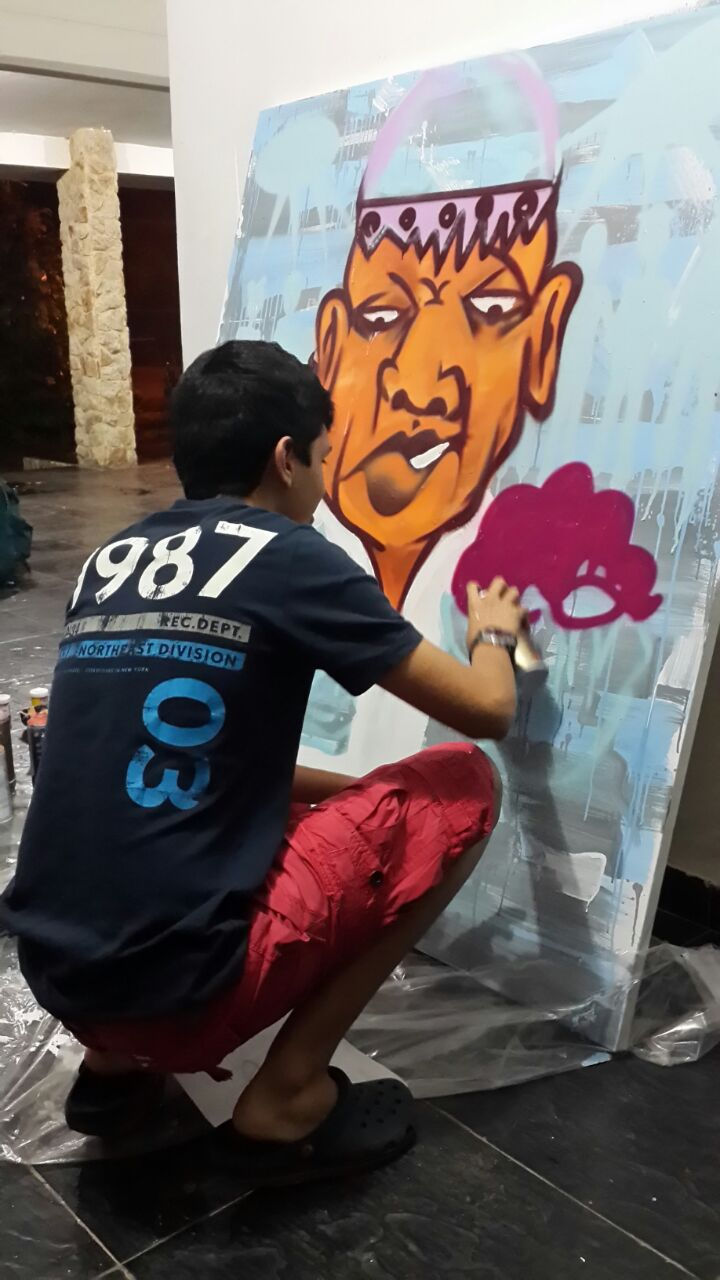


Materials:
-
Spray painting cans (of various colours)
-
Hair drier
-
Acrylics (red, yellow, blue, white, and black)
-
Water
-
Brush
-
Big plastic
-
Canvas (1.50 m x 1.30 m)

For the practical lesson, Repso brought this time a friend of him to help me as well. Her name was Angelica, she had lots of experience with street art as well, and she assisted me too when I needed guidance or help.


There were a lot of difficulties during the process but fortunately I was able to overcome each one of them:
-
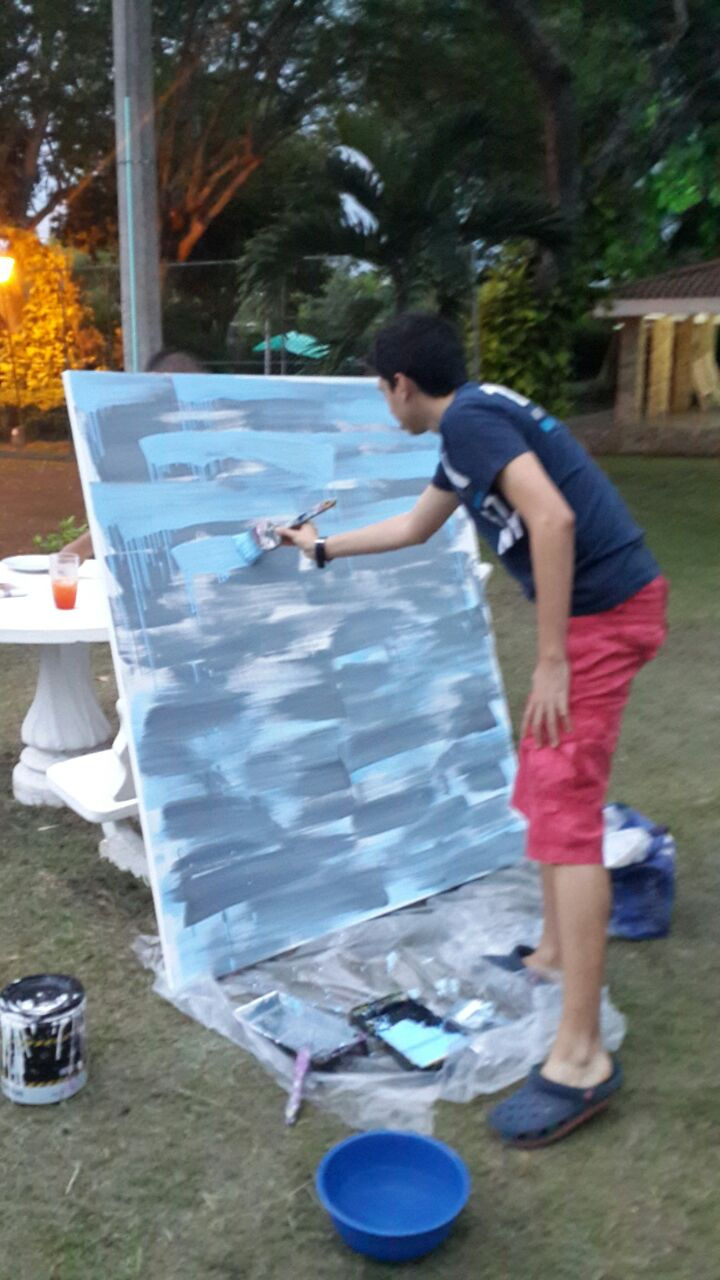
The first inconvenient I had was trying to translate my sketch idea to the actual canvas. The problem was that the canvas didn't match with the proportions of the paper I did my sketch on (it was much wider and almost a square). For this reason I had to re-design my sketch in my mind and I realised I had to remove the legs of my character for making a good product. I was able to face this small situation without any major problem and didn't waste a lot of time
-
The second inconvenient I had wasn’t that much of an obstacle but a frustrating event. Just as I was finishing the background of my art piece it started raining (and I was outdoors). I had to move everything (Aerosol paints, acrylics, canvas, plastic, etc.) inside my house. The problem with that was that now I needed to be extra careful with the paint since I wasn’t outside anymore.
-
Just after the previous issue the 3rd difficulty came in, and it was that the paint was drying too slowly and I was never going to finish at that pace. My parents helped me with that since they had the idea of bringing a hair drier and an extension cable for me to use it. This worked perfectly and saved me a lot of time throughout the process.
-
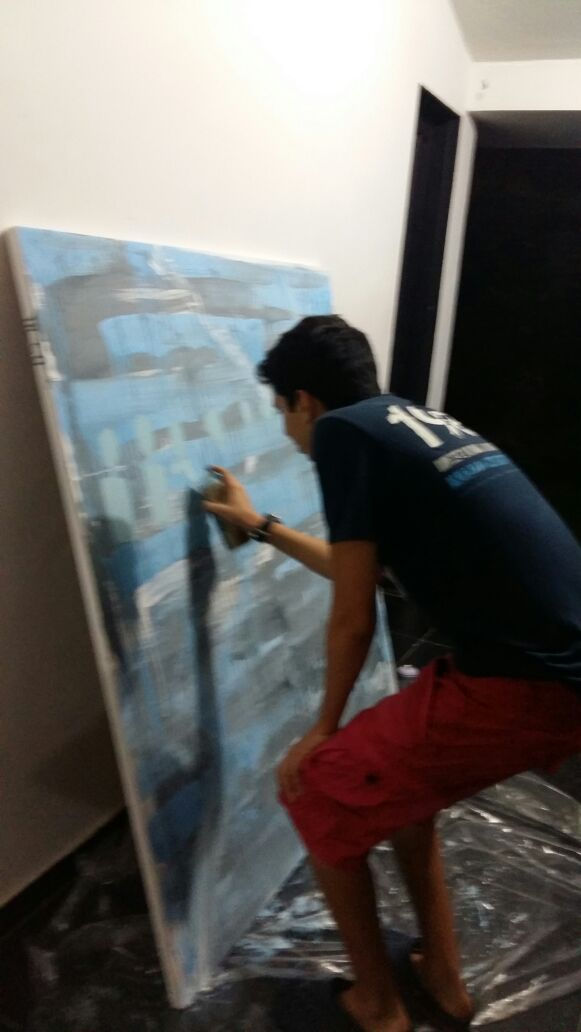
I had some mistakes with the spray paint and I painted over spaces that I wasn't supposed to. Since I didn't have any previous experience with spray-painting it was difficult for me controlling where I was painting and stopping where I wanted (apart from controlling the speed, distance, and strength applied). The good thing though is that with aerosol paint almost everything can be corrected, and I also had the acrylics for fixing details. Moreover, after some time I started to understand better how to work with aerosol paint (with the help of my teacher) and I had a much better control on what I was doing. This felt really good since I was overcoming my difficulties and really improved in a short amount of time.
-
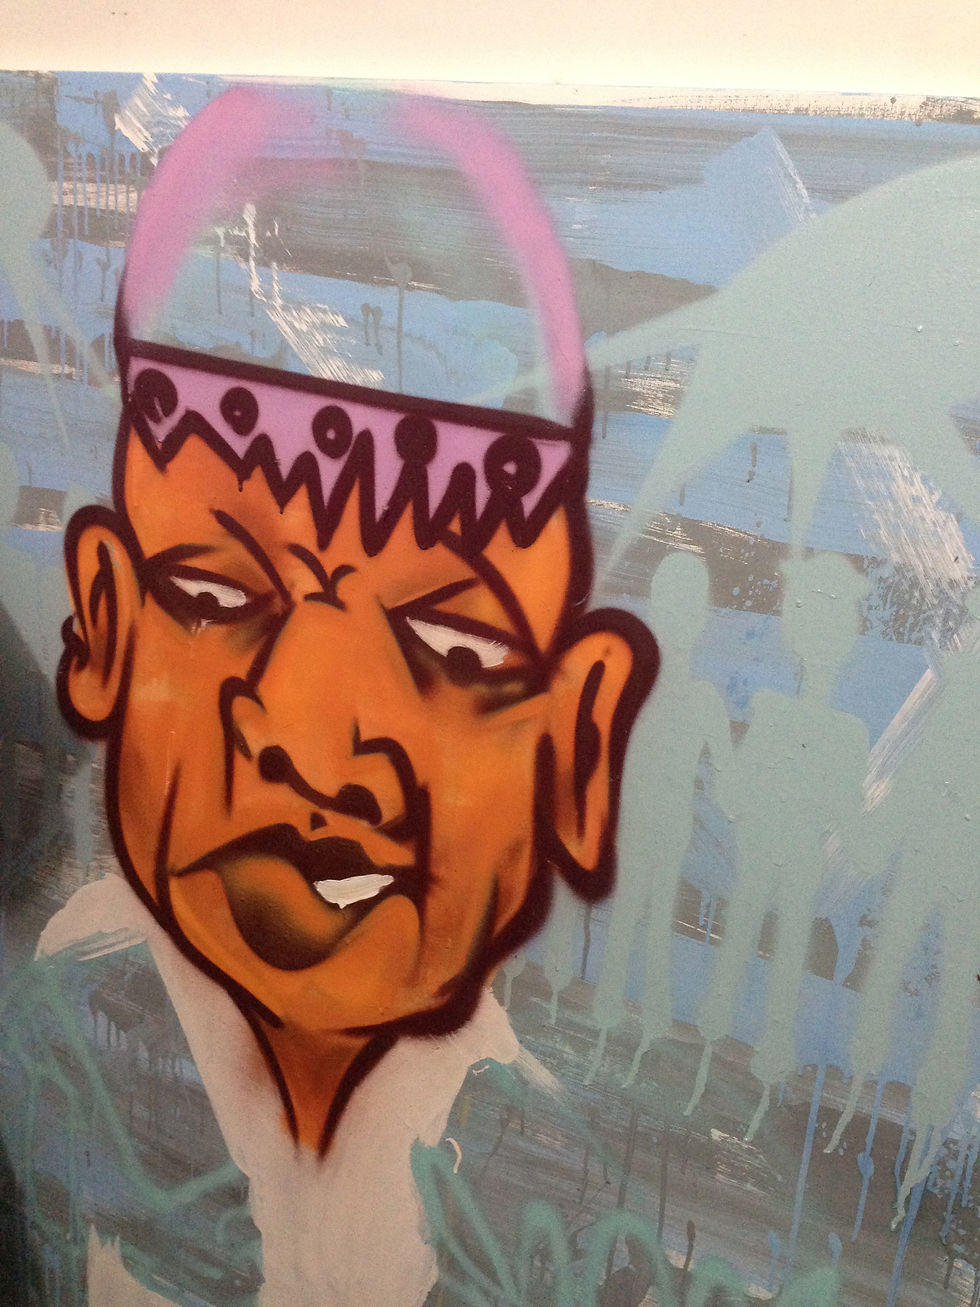
The final problem I encountered was later on, when the only thing I was missing to paint was the chain of the character. The problem was that the spray-paint was too thick for doing the chains I wanted, so I needed to make the links of the chain a lot bigger than I wanted. Still, this was the only way it was going to work, and though it wasn't going to look as I planned at the end I corrected some parts with the acrylics and I ended up feeling pretty satisfied.
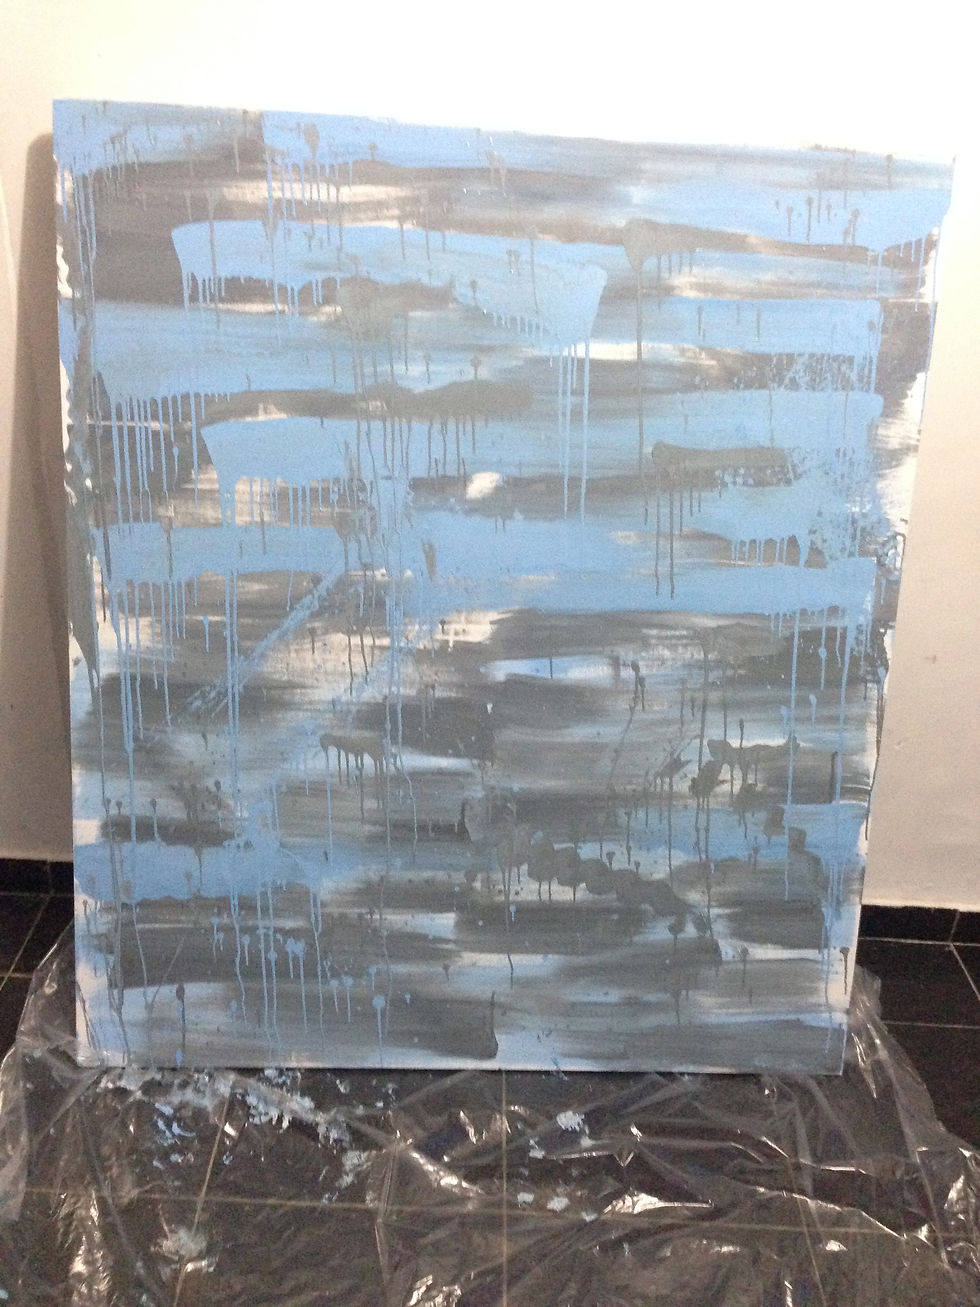
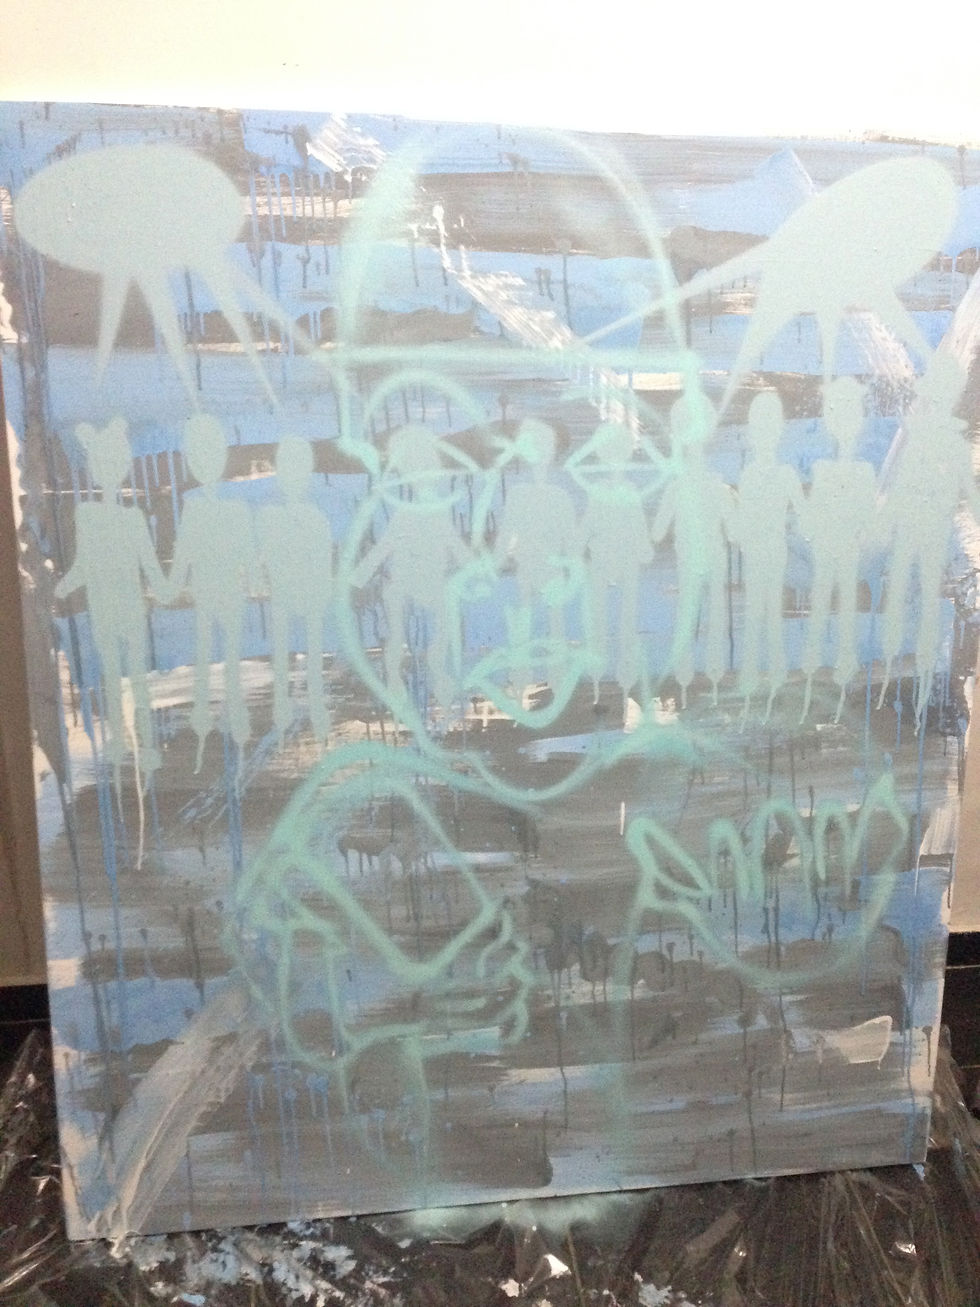
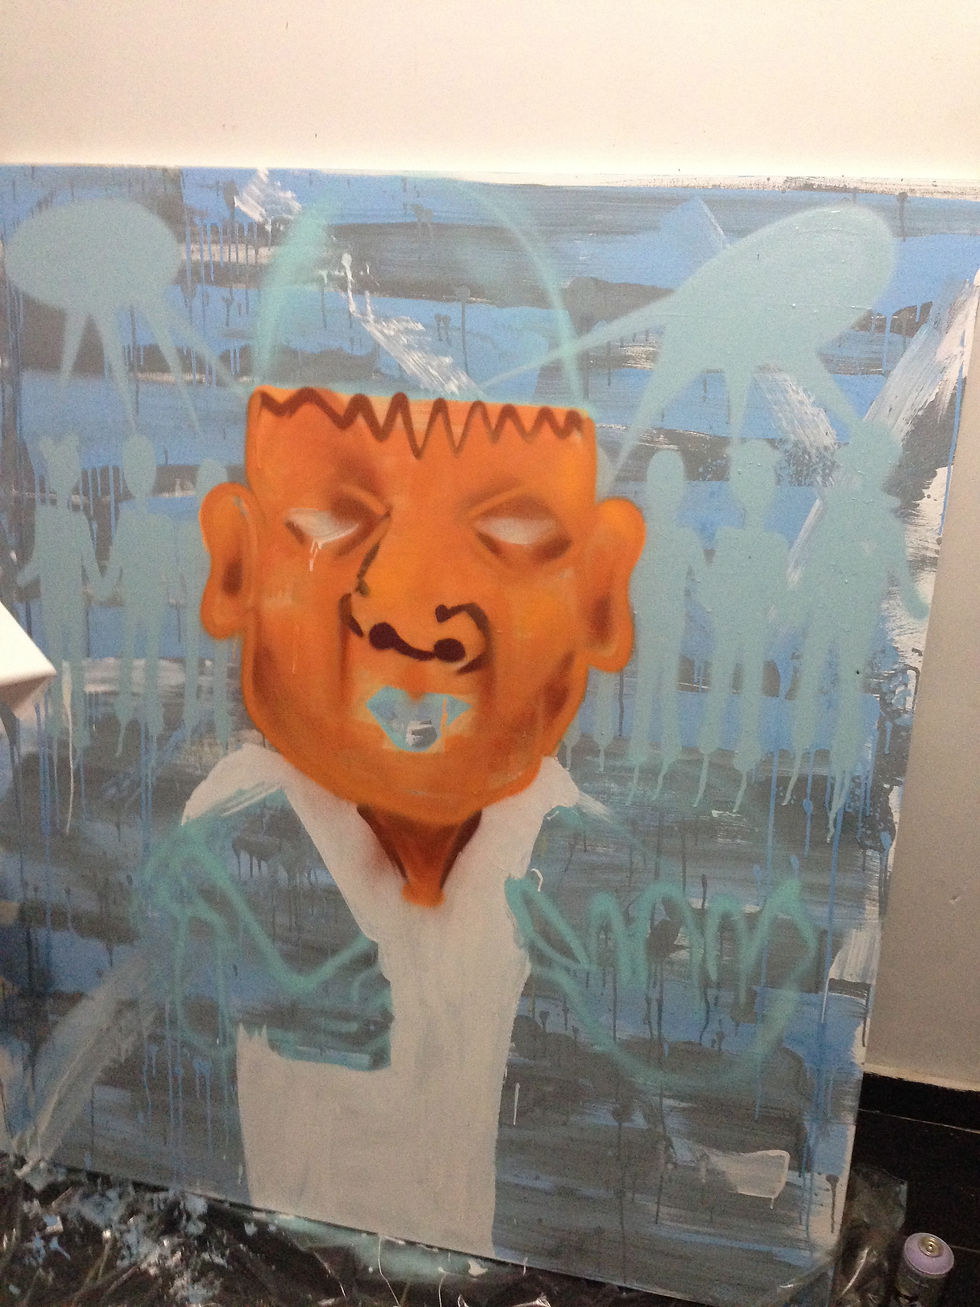
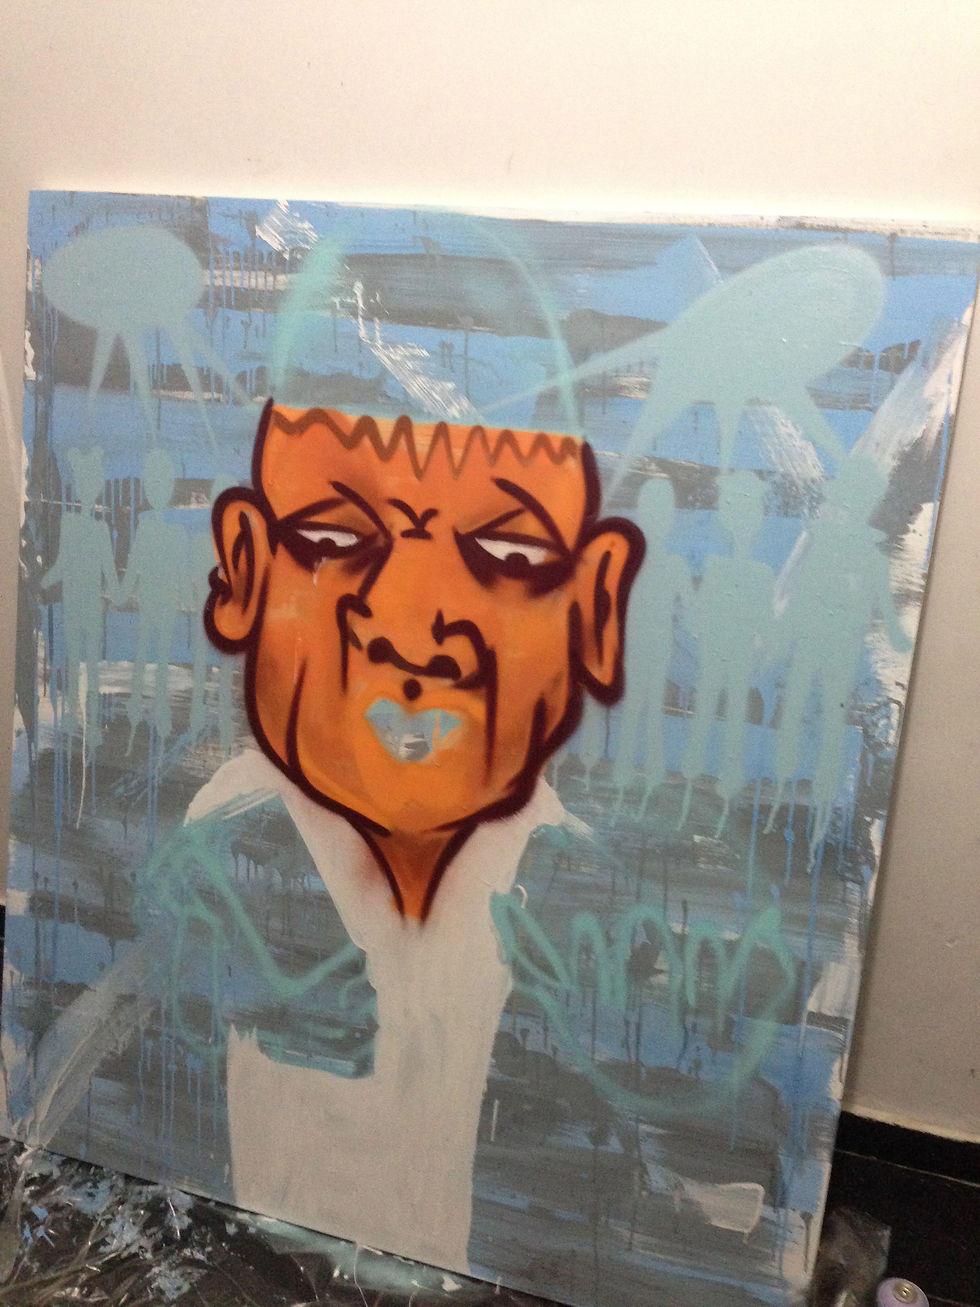
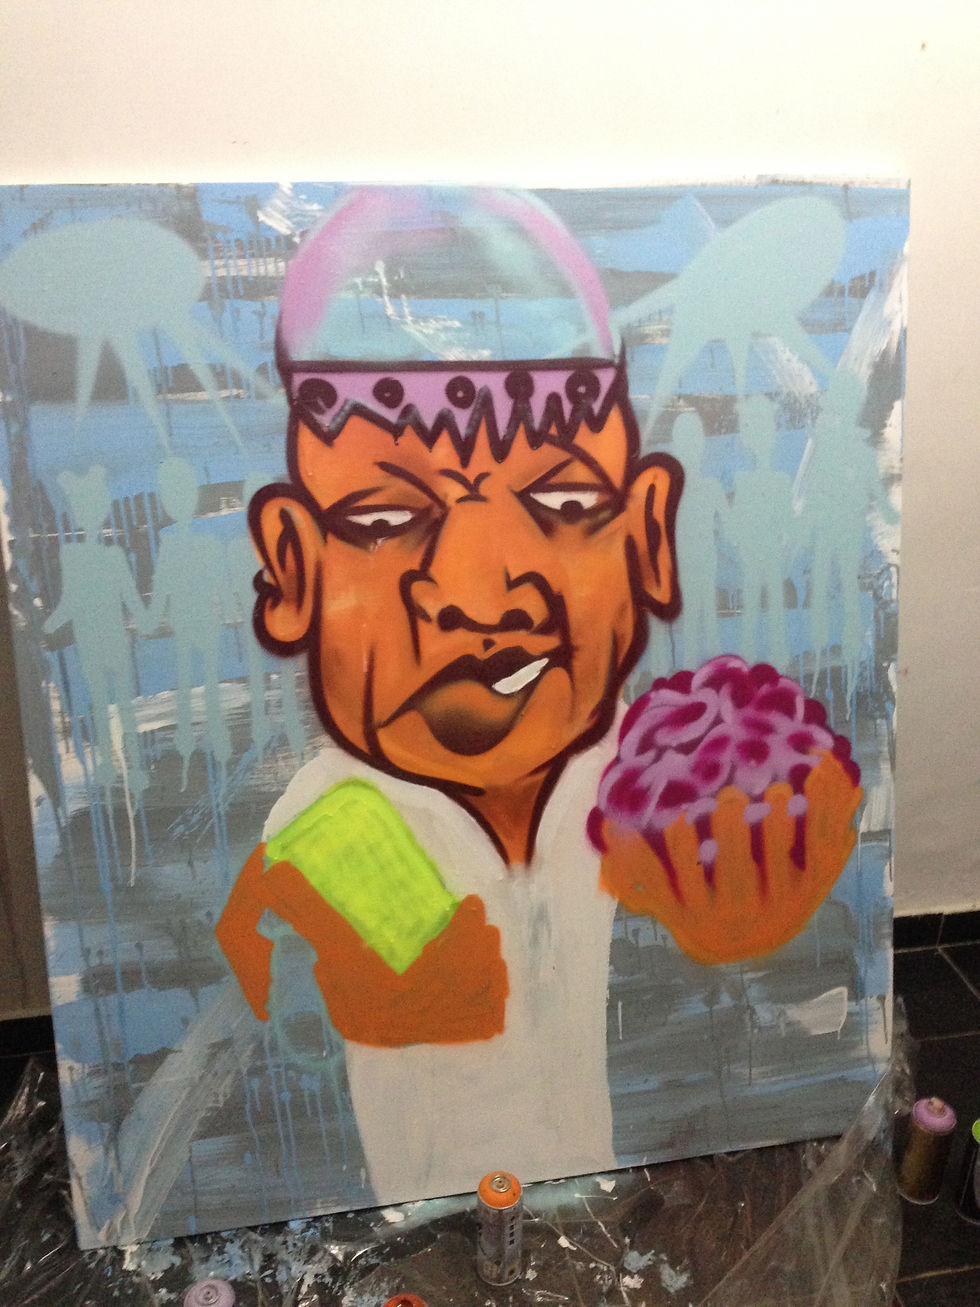
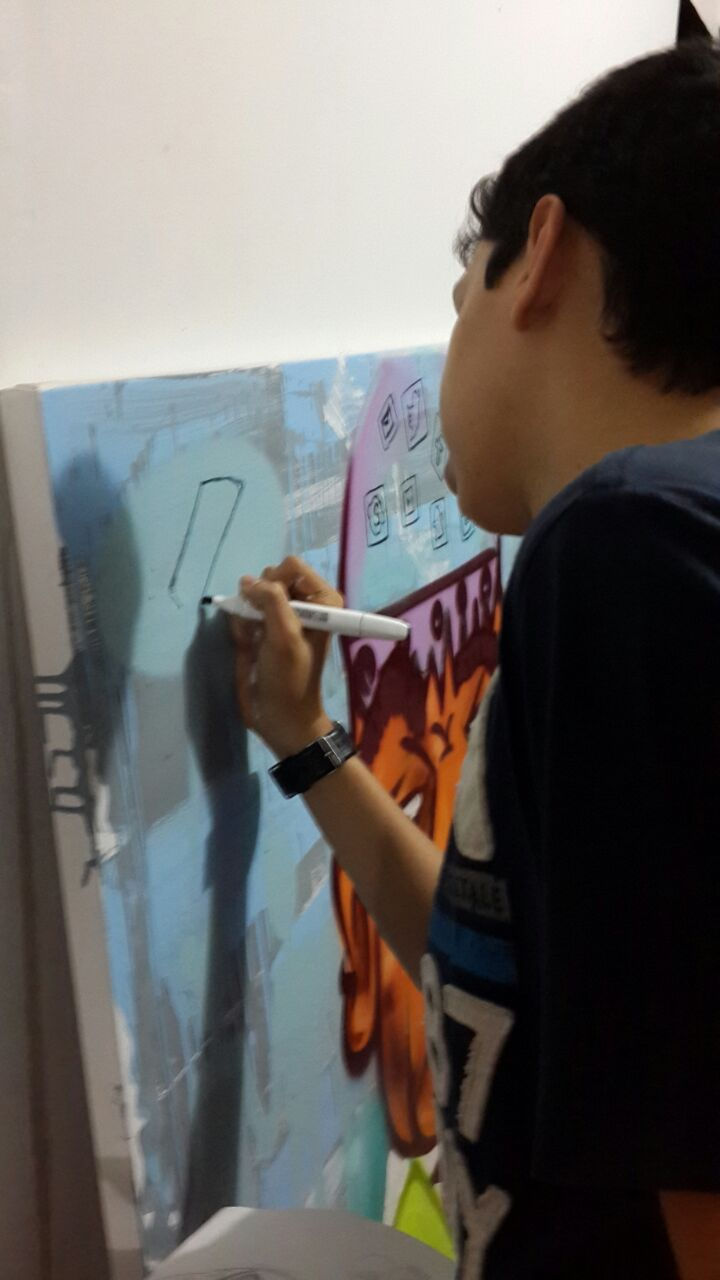
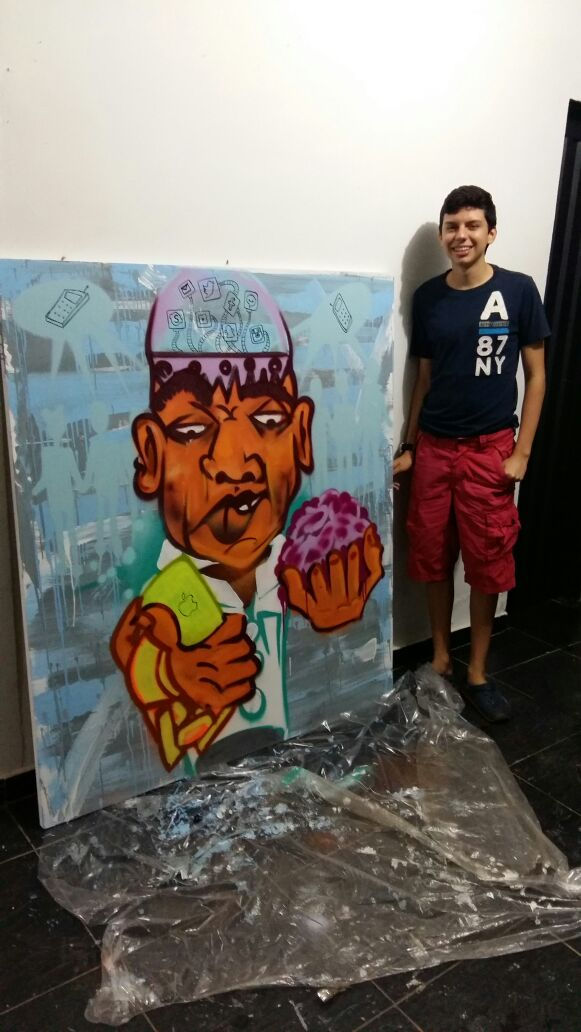
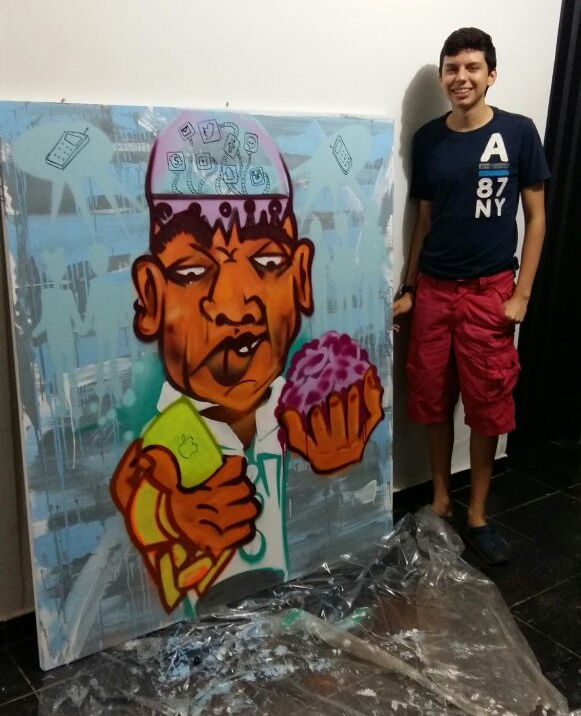
I consider that my final product has a really good quality and I put a lot of effort into it. I am pleased with everything I was looking for, and I can say that all the hard work was worth it. I learned a lot of things by doing it and even since I started planning it. I gained knowledge on different areas, which range from the theory of colour to how to manage aerosol paint. One of the things that I must say I learned is that graffiti art and spray painting is all about the lines. With a proper management of lines you can do a pretty good job on making whatever you want, but you need to be careful with the speed, distance, and pressure that you apply to the aerosol. I also achieved the objective of highlighting the character in my art piece by using warm colours in it and cool colours in the background, so it is really effective when it comes to draw people’s attention. Furthermore it successfully transmits the message I wanted about addiction to technological devices, and the audience (students) is reached since the character wears the school uniform. With all this I can argue how street art isn’t vandalism but a form of expression and art, since I myself have experienced it. I have now lived all the work that's behind a piece of street art and all the creativity and effort that you need.
ATL skills:
-
Identify obstacles and challenges.
-
Troubleshoot systems and applications.
-
Evaluate solutions to problems.
-
Create original works and ideas and visualize alternatives.
-
Apply skills and knowledge in unfamiliar situations.
-
Make decisions.
-
Plan and manage activities to develop a solution or complete a project.
-
Practice dealing with disappointment and unmet expectations.
-
Create a record of personal learning, change and improvement.
Final Product:
ATL skills:
-
Use multiple processes and diverse perspectives to explore alternative solutions.
-
Transfer and apply existing knowledge to generate new ideas, products or processes.
-
Use your knowledge, understanding and skills across subject to create products or solutions.
-
Make connections between learning gained in different subject areas.
-
Create projects and products using knowledge and skills gained across different subject areas.
-
Analyze one’s own and others’ thought processes to think about how one thinks and how one learns.